How Does Print Orientation Affect 3D Printing Quality?
Learn how print orientation influences visible surfaces, supports, strength and finishing, and what to tell the studio before your model is manufactured.
MAKE
10/16/20264 min read


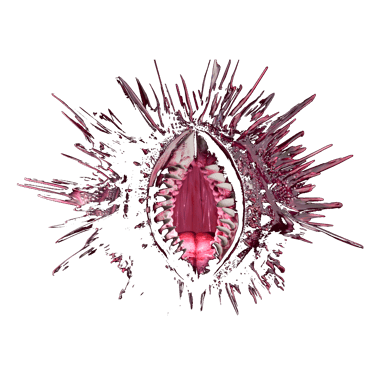
Reconstructing the Oyster. A finished form from the material study discussed below. Project photography courtesy of the client.
The position in which an object will be used is not necessarily the best position in which to print it. A sculpture displayed upright may be manufactured at an angle. A component may be turned so that a critical face is easier to produce or finish.
Orientation is a production decision about the whole object. It affects where supports may be needed, which surfaces are exposed to them, and how the printed structure relates to the intended use. There is rarely one direction that improves every requirement at once.
Start with what matters after printing
Before discussing angles, identify the priorities. Which face will be seen first? Where does the object connect to something else? What will be handled, loaded or painted?
An annotated image is often enough to communicate this. Label the presentation face, the connection surfaces and any area where a mark would be particularly difficult to accept. If every side is visible, make that explicit.
Avoid calling one side the “back” unless it will genuinely be hidden. In an exhibition, a visitor may walk around an object. A production decision based on a photograph taken from the front could overlook that experience.
Supports have to go somewhere
Reorienting or dividing a model can change its overhangs and support requirements. It may reduce the need for supports in one area without removing the need elsewhere. There is no single support-free angle that can be promised for every geometry.
The important question is not only how many supports appear in a preview. Consider where they meet the object and whether they can be reached for removal. On resin parts, contact points can leave marks that require attention.
For a brief, describe which surfaces must remain visually clean and which will be prepared or painted. Do not assume that a small contact point will be invisible after removal, or that every hidden cavity can be accessed later.
A real example: the Oyster material study
In LILIS LAB's Reconstructing the Oyster project, a scanned form was explored through different printing processes and materials. For the flexible resin version, the studio developed the orientation and supports around the surface that mattered most to the client, concentrating support contact on the reverse.
The useful lesson is the priority behind the decision. The visible surface was identified before production. This does not establish a universal angle for organic forms or show that the same arrangement would suit a different material.
Structural use introduces another priority
FDM parts can behave differently in different loading directions because of their layered construction. A visually convenient orientation is therefore not enough to establish that a part is suitable for a mechanical task.
Tell the studio how the part will be used rather than asking simply for the “strongest orientation”. Is it holding its own weight, being bent during assembly or connecting to a moving component? A drawing showing the direction of a force can be more useful than a strength adjective.
Material, geometry and the proposed production route still need assessment. Do not interpret a successful visual prototype as evidence that the part is ready for a demanding or safety-critical use. That requires an appropriate engineering and validation process.
Surface appearance and assembly can compete
One orientation may protect a presentation face while making a connection area harder to prepare. Another may simplify support removal but put a visible seam or mark somewhere undesirable. The right decision depends on which requirements are essential.
Imagine a decorative cover that fits over an existing component. Its exterior appearance matters, but so does the internal fit. The brief should identify both. Neither a clean-looking exterior nor a convenient build position proves that the finished cover will fit.
If the requirements cannot be met comfortably in one piece, discuss separate components. That creates an assembly decision of its own: where should the joints go, how will they be aligned, and who will complete the work? Agree those points as part of the production scope.
A shorter print is not always less work
Orientation can change the build arrangement, supports and amount of clean-up. The effect on machine time depends on the process and setup. A lower-looking model is not enough evidence to promise a faster or cheaper completed object.
Ask about the delivered result. A route that needs less machine time may still require more preparation afterwards. If an alternative is proposed, compare the surface condition, assembly and finishing included, not just the position shown in a screenshot.
Use tests to answer a particular question
For a project with competing priorities, a useful test has a clear purpose. It might check a connection, the appearance of a specific face or the practicality of removing supports from a delicate area.
Agree what the test is expected to establish before producing it. A small detail sample does not demonstrate the behaviour of an entire large assembly, and changing the material later may require the decision to be revisited.
If you are comparing physical orientation samples, keep the other variables consistent where possible. Record the material, process and finishing condition. That makes the comparison useful without implying that one arrangement is best for every object.
TELL US WHAT THE OBJECT NEEDS TO DO
Send the model, intended dimensions and a view marking the surfaces or connections that matter. You do not need to choose a printing angle before contacting us.
EXPLORE 3D PRINTING
START A PROJECT

Lunae Group Ltd trading name: Lilis Lab
Studio by appointment only
Monday to Friday
09:00 am – 6:00 pm
Stratford, London E15 2SP
Upload files & order online 24/7
Address:
our service
3D design & development
on-demand 3D printing
post production & finishing
photography & visual production
artist platform
Contact Us
Email: info@lilislab.co.uk
Whatsapp/Phone:+44 7462 549660
WeChat: lilislab
© 2026 Lunae Group Ltd // Registration: 16961587